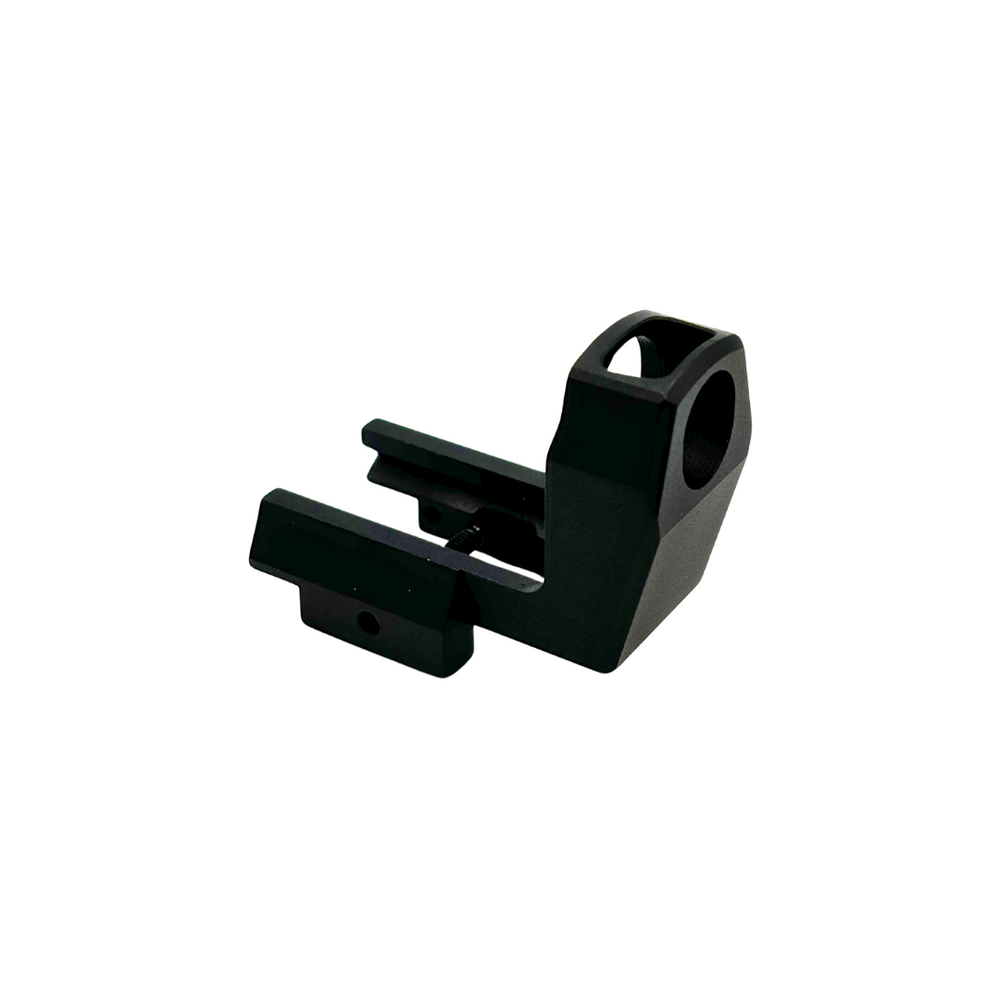


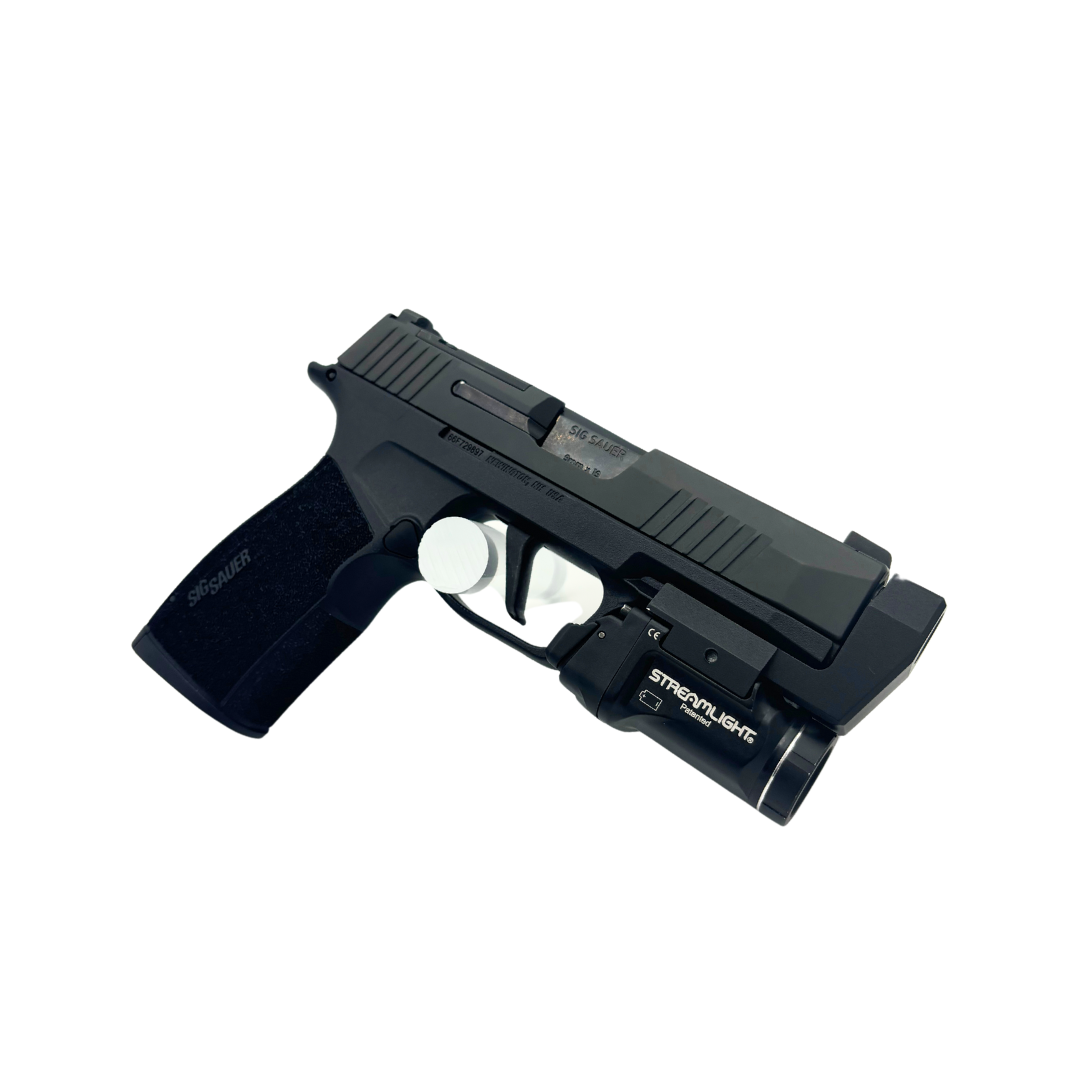

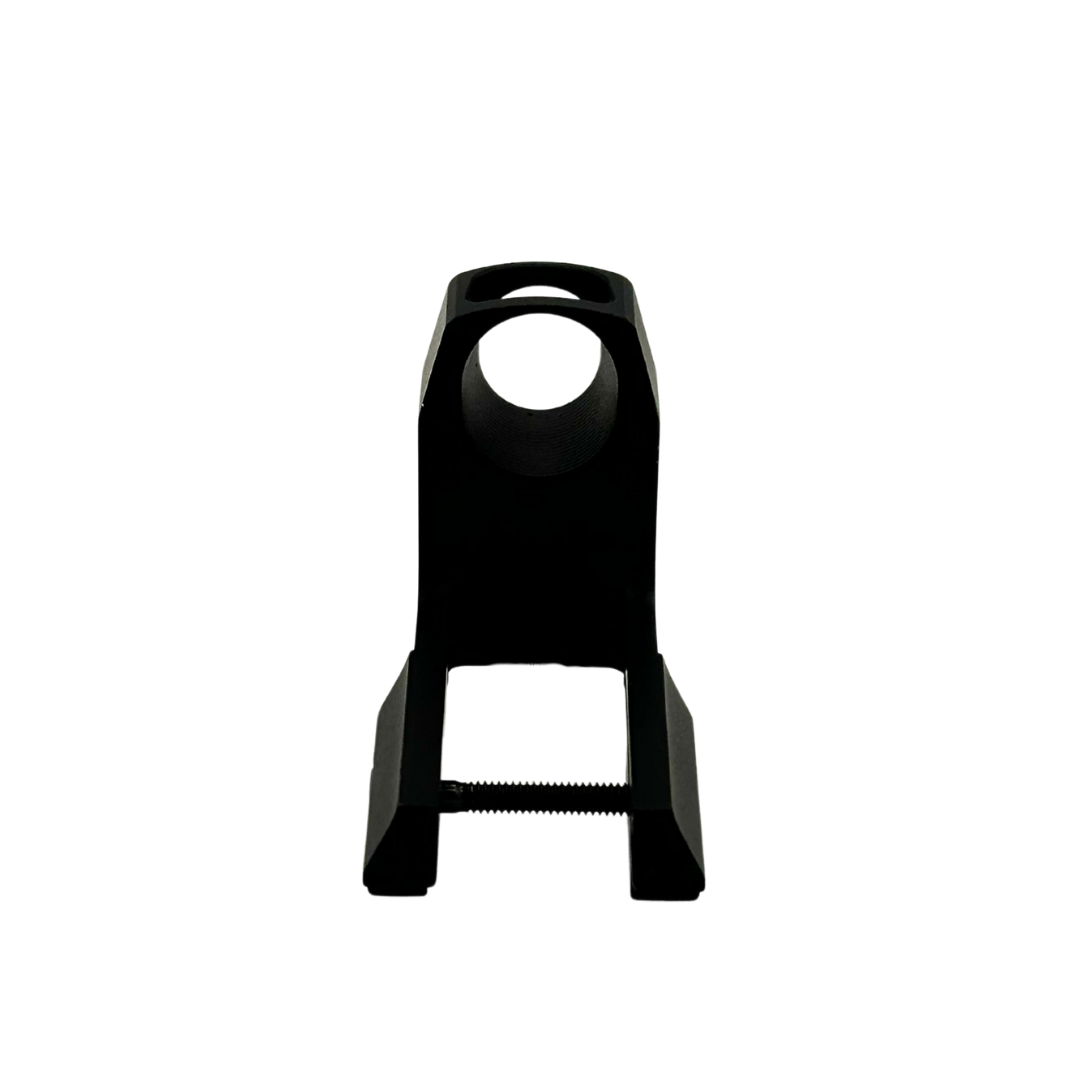


Light-Mounted Compensator for Sig Sauer P365 XMACRO Pistols
- In stock, ready to ship
- Backordered, shipping soon
- 100% Made in U.S.A
***COMPATIBLE WITH X MACRO MODEL ONLY - WILL NOT FIT Sig Sauer® PROPRIETARY RAIL SYSTEM***
Purchase Additional/Replacement Screw/Washer for Compatible Compensators here.
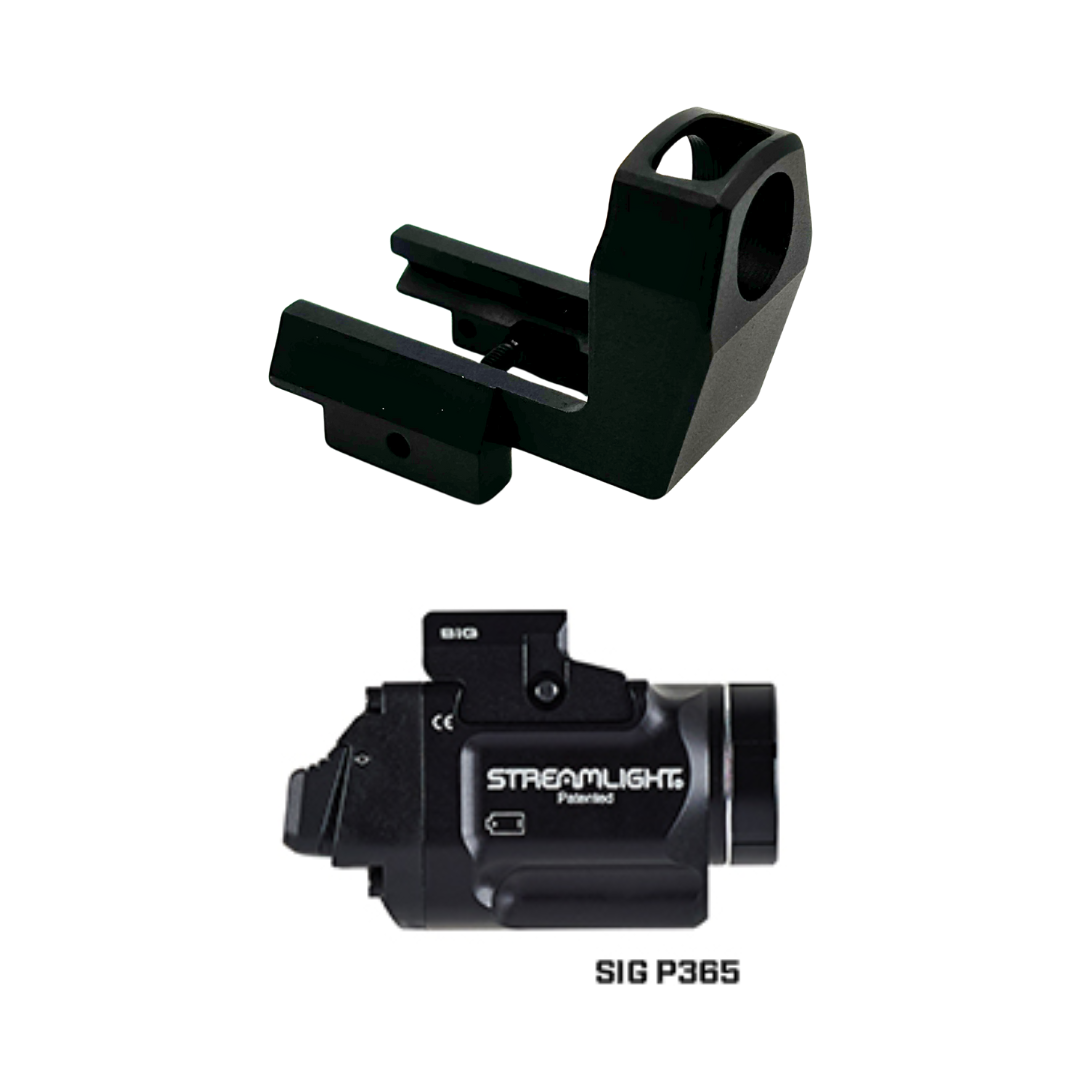
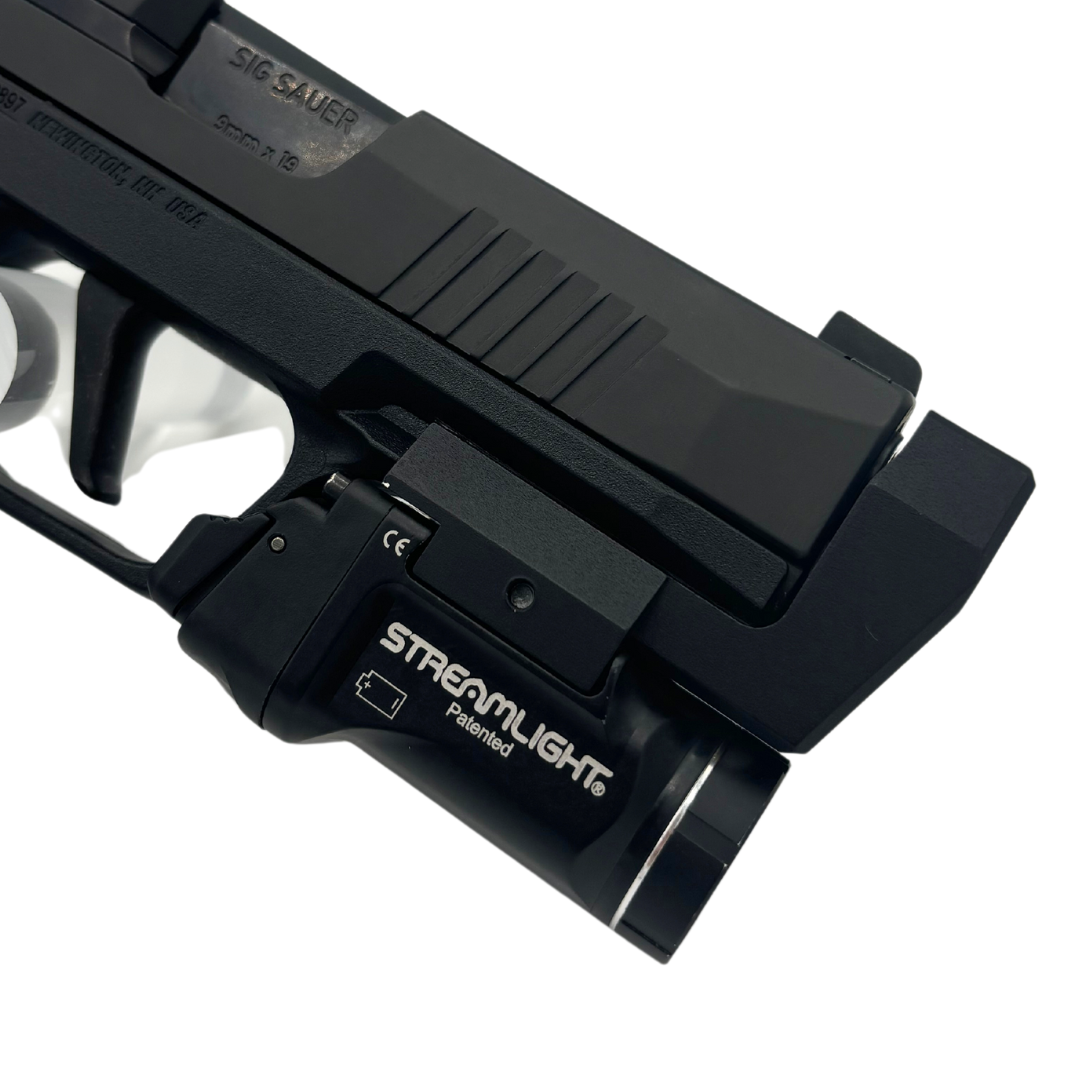
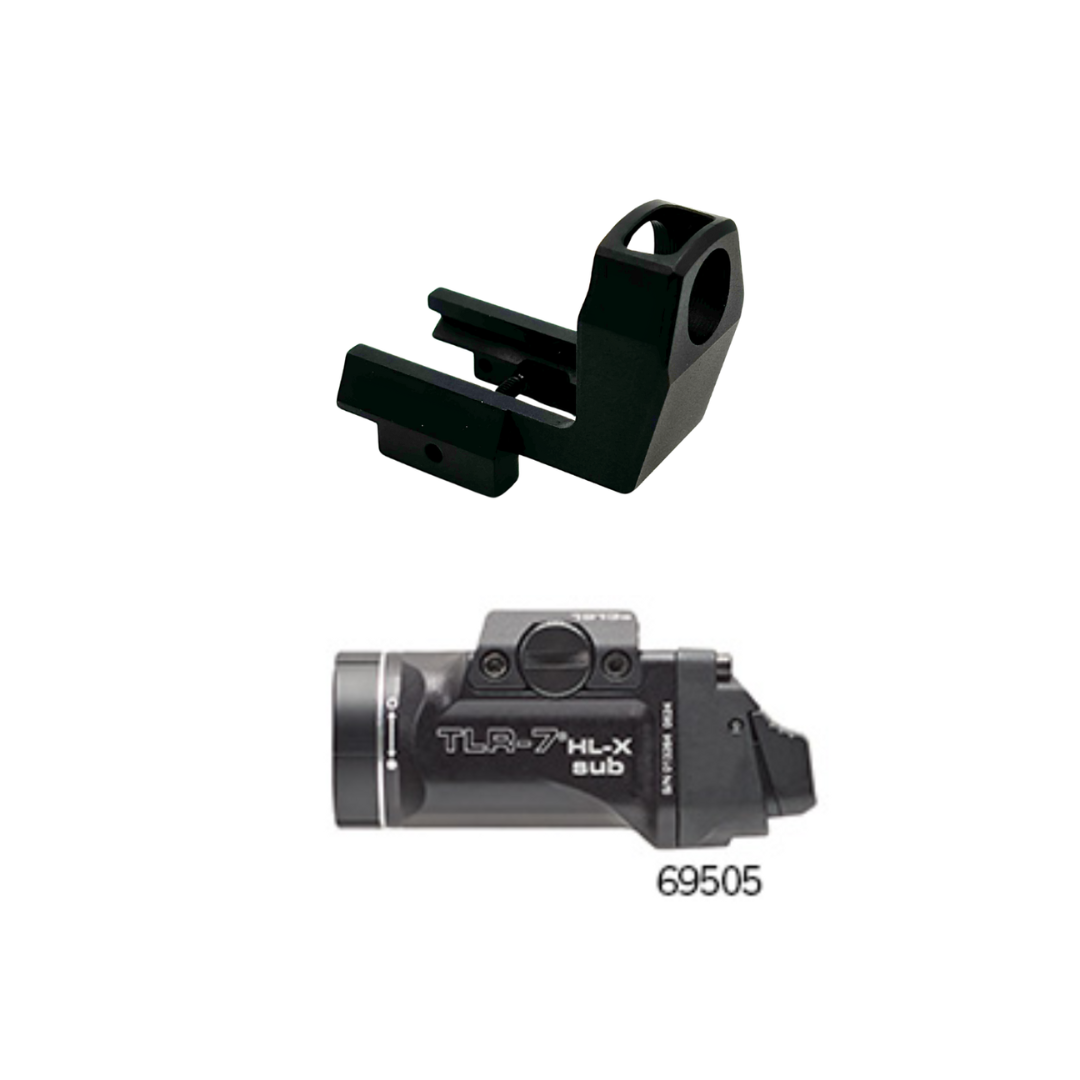
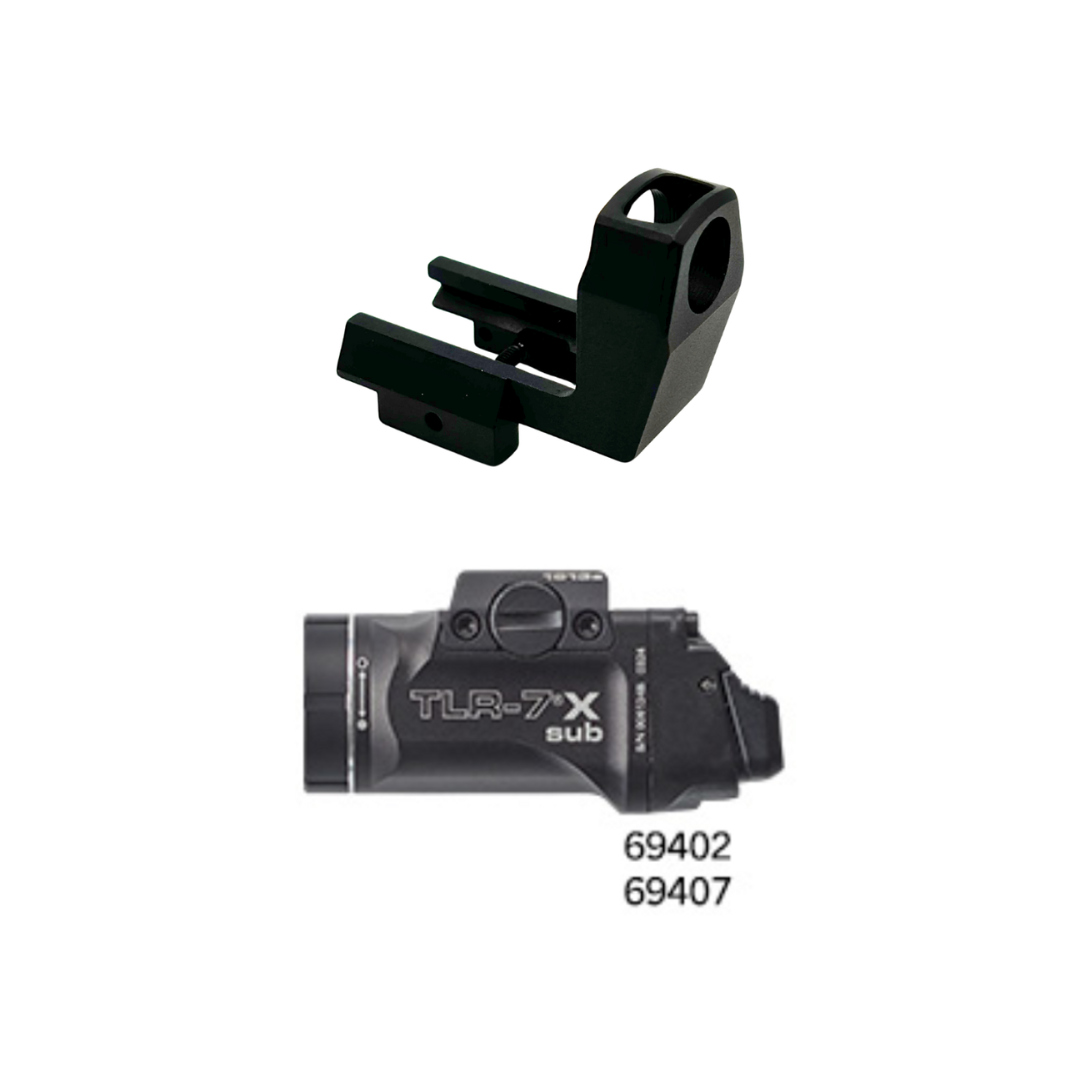
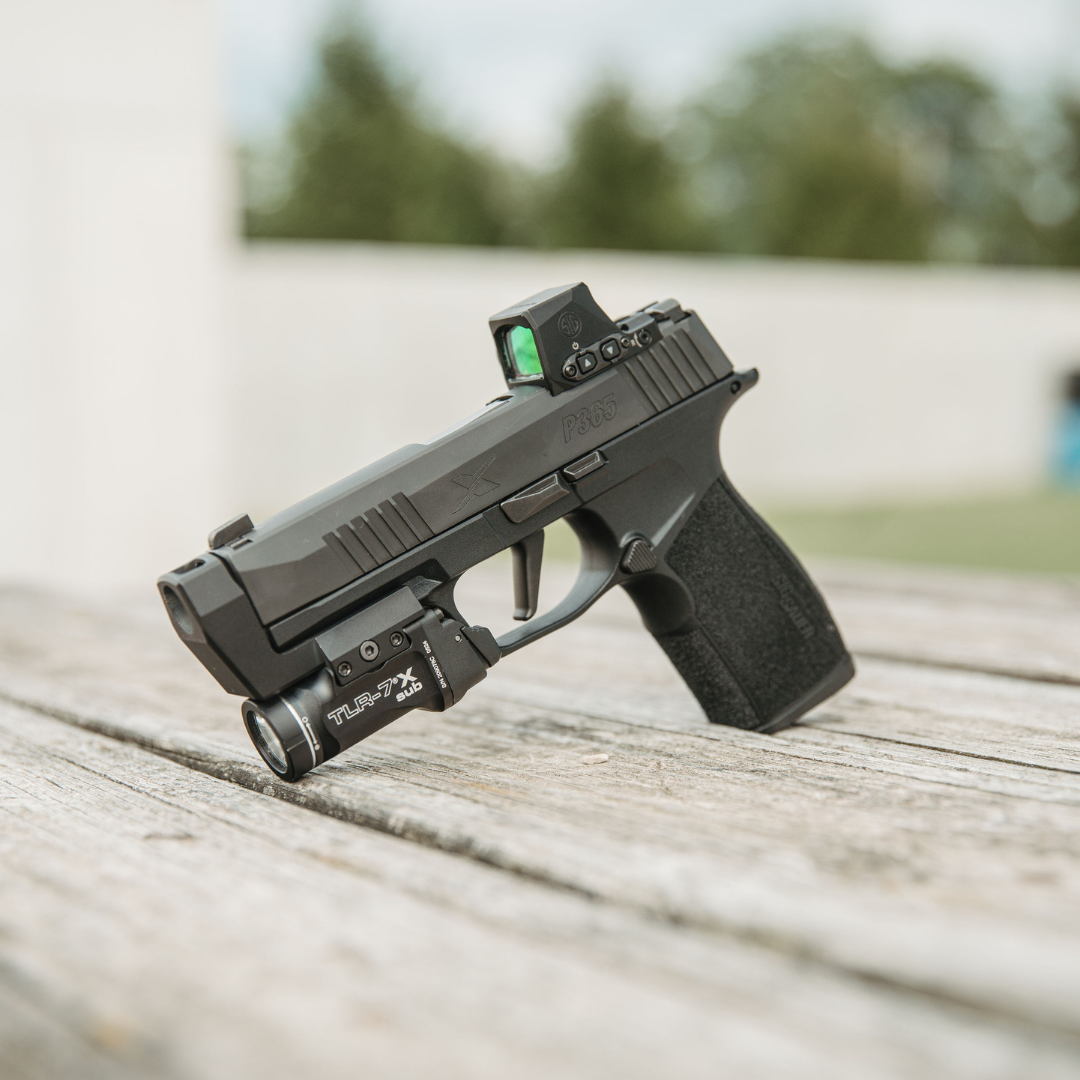
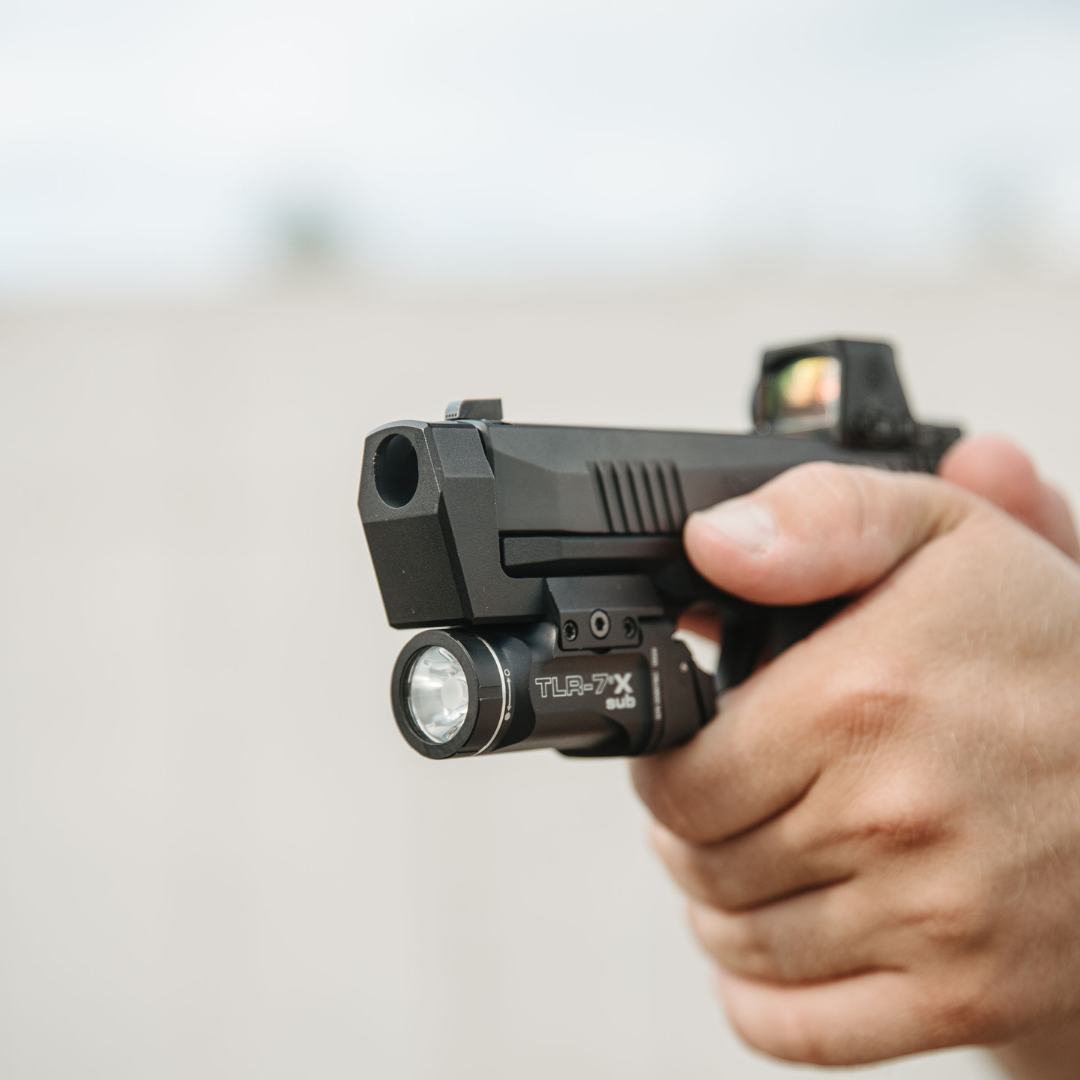
This Compensator model is designed to mount to a Sig SauerSig Sauer® P365 XMACRO / 9mm Tactical Handgun via a Streamlight Sig Sauer® TLR-7 HL-X Sub USB - 1913 Short Rail Streamlight, TLR-7 X Sub USB - 1913 Short Rail, or TLR-8 G Sub - 1913 Short Rail Gun Light. This compensator replaces the thumbscrew attachment of the Streamlight.
Please see instructions and information below before adding to cart.
Transform your shooting experience with precision and control. The VP Armory Compensator combines innovative rail-mounted technology with a patent-pending design — delivering reduced recoil, faster follow-ups, and 50-state legal compliance without modifying your firearm.
Key Features and Benefits
Minimize Recoil / Reliable Compensation:
- Reduces muzzle rise by 20–30% for flatter shooting and quicker follow-up shots.
- Ports redirect gases upward for consistent control.
No Threaded Barrel Needed:
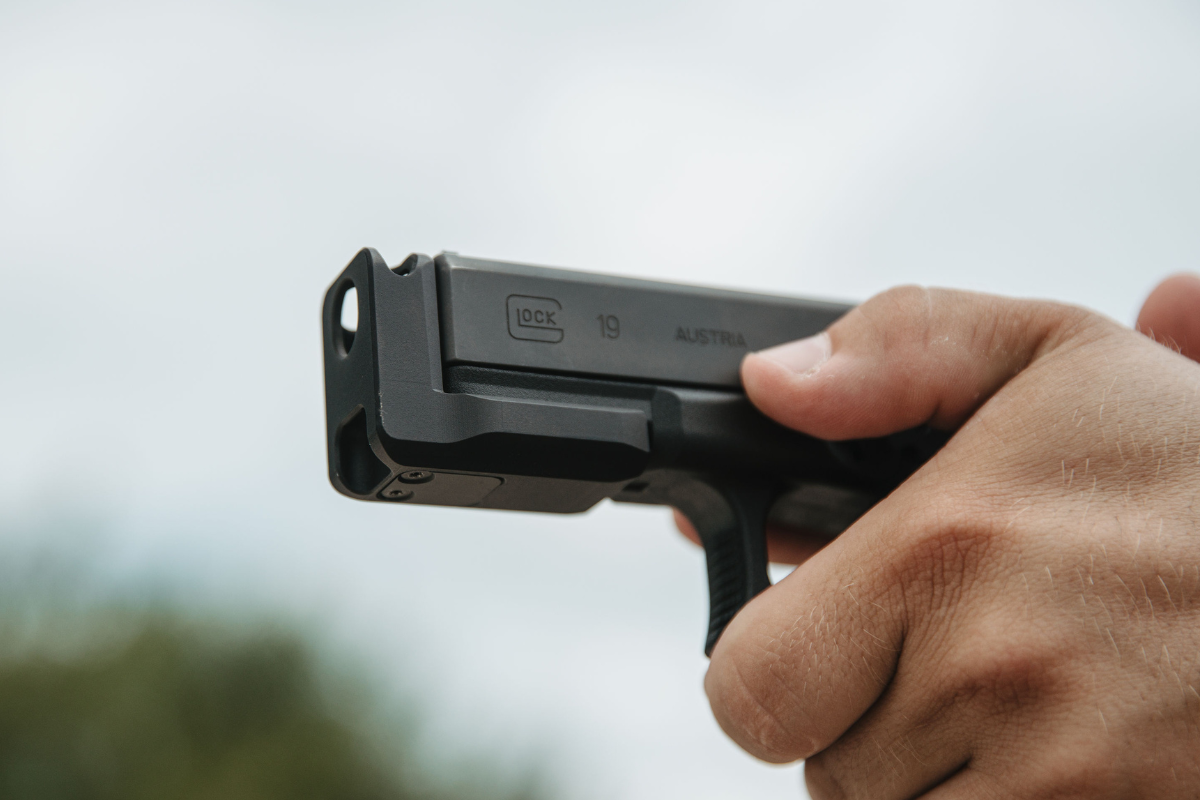
- Mounts via your Streamlight TLR-7 HL-X Sub USB - 1913 Short Rail Streamlight, TLR-7 X Sub USB - 1913 Short Rail, or TLR-8 G Sub - 1913 Short Rail Gun Light to the accessory rail, staying compliant and easy to install.
- Since this system is not attached to the slide or barrel it does not inhibit, change or impede the cycling action of the pistol.
- No gunsmithing, no threading, no permanent modifications.
Enhance Stability:
- Improves shot-to-shot recovery and target reacquisition.
Rugged and Reliable:
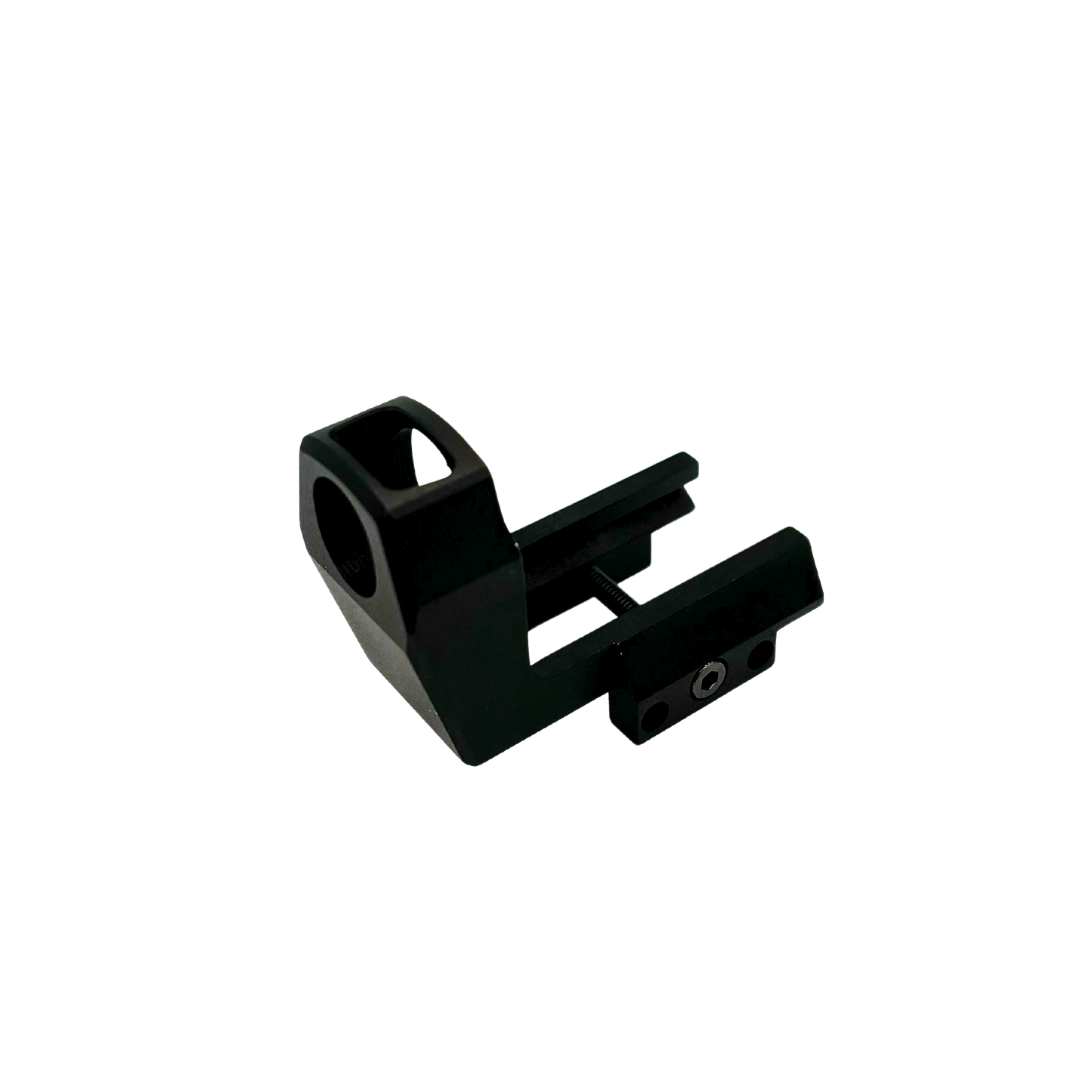
- CNC-machined from solid aluminum bar stock.
- Tested to withstand high round counts and repeated use.
Holster Selection:
-
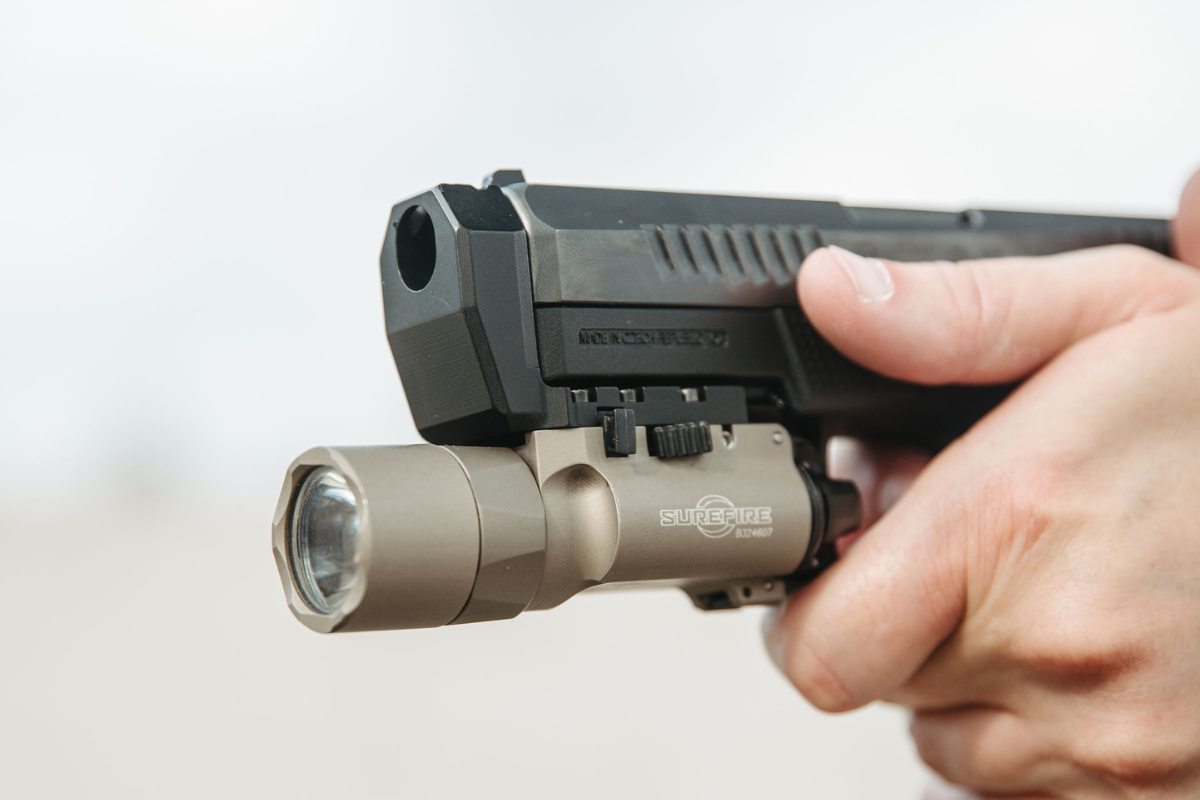
The compensator works seamlessly with holsters that accommodate standard frame-mounted accessories, such as the Surefire X300U-A light or Streamlight TLR-7. The accessory remains in the original position, maintaining holster compatibility.
- No additional fitment or modifications required.
- Learn more about holster compatibility here.
Standoff Device:
- Keeps your pistol in battery if pressed against a surface in defensive situations.
Ease of Cleaning:
- Quickly detaches for cleaning — no need to re-time or rethread like barrel-mounted comps.
Price vs. Competition:
- Since the VP Compensator mounts to the accessory rail, there is no need for expensive aftermarket barrels.
50 State Legal:
- Fully compliant design for civilian, LE, and military users in all 50 states.
Sleek Design:
- Designer has matched the lines of each individual slide to the compensator, resulting in a streamlined device.
Made in USA
- Crafted from premium materials with precision in the USA.
- Anodize Color: Black
- Material: 7075 Aluminum
- Rated for Standard and +P/+P+ Ammo
- Factory slide, barrel, and frame required for proper installation
Carefully read and follow the instructions below to avoid damaging your compensator and firearm.
DISCLAIMER: This product is not manufactured, authorized, endorsed, or warranted by Sig Sauer®. Sig Sauer® does not warrant or represent that this product is compatible with Sig Sauer pistols.
DISCLAIMER: Neither Vantage Point Armory, LLC nor this site is affiliated with, or endorsed by, Sig Sauer®. The use of “Sig Sauer” on this page is solely to indicate compatibility. Components and parts that do not specifically list Sig Sauer as the manufacturer are made by their respective companies. Such parts may be intended for use with Sig Sauer components but are not produced by Sig Sauer. For additional genuine Sig Sauer products and parts, visit www.sigsauer.com.
DISCLAIMER: This product is not manufactured, authorized, endorsed, or warranted by Streamlight® Inc. Streamlight® and TLR® are registered trademarks of Streamlight® Inc., and are used solely to indicate compatibility.
Carefully read and follow the instructions below to avoid damaging your compensator and firearm.
PLEASE NOTE:
- Will not reduce slide velocity or induce reliability issues.
- DO NOT USE WITHOUT THE PISTOL LIGHT ATTACHED TO THE COMPENSATOR. The pistol light is required to attach the compensator to the gun. Ensure the compensator is properly seated and installed prior to live fire. Failure to do so can result in damage to the compensator that is not repairable under the warranty.
Upgrading your handgun with a compensator requires a higher level of maintenance and care. Ensuring that it is installed correctly and checked frequently is critical for proper function and safety.
Results may vary depending on the handler. Vantage Point Armory is not in any way responsible for the misuse of firearms or firearm parts/accessories or the results of such misuse. We highly recommend gun owners inspect parts and accessories frequently. This will help mitigate the possibility of accidents and malfunctions.
*The Vantage Point Compensator is intended for use on OEM pistols only - VPA does not guarantee function or reliability with aftermarket or modified guns
DISCLAIMER: This product is not manufactured, authorized, endorsed, or warranted by Sig Sauer®. Sig Sauer® does not warrant or represent that this product is compatible with Sig Sauer pistols.
DISCLAIMER: Neither Vantage Point Armory, LLC nor this site is affiliated with, or endorsed by, Sig Sauer®. The use of “Sig Sauer” on this page is solely to indicate compatibility. Components and parts that do not specifically list Sig Sauer as the manufacturer are made by their respective companies. Such parts may be intended for use with Sig Sauer components but are not produced by Sig Sauer. For additional genuine Sig Sauer products and parts, visit www.sigsauer.com.
DISCLAIMER: This product is not manufactured, authorized, endorsed, or warranted by Streamlight® Inc. Streamlight® and TLR® are registered trademarks of Streamlight® Inc., and are used solely to indicate compatibility.
Step-by-Step Instructions for Assembling the Light-Mounted Compensator for Sig Sauer P365 XMACRO Pistols (video instructions linked here):
Before you begin, ensure you have the following:
- VP Armory Light-Mounted Compensator for Sig Sauer P365 XMACRO Pistols
- Streamlight TLR-7 HL-X Sub USB - 1913 Short Rail Streamlight, TLR-7 X Sub USB - 1913 Short Rail, or TLR-8 G Sub - 1913 Short Rail Gun Light
- #4 insert included with light
- 5/64” Allen key
- Torque wrench (optional but recommended)
- SIG Sauer P365 XMACRO Pistol
- 2 Hex-Head Screws (Included with Light)
- All screws must be de-greased prior to installation. We recommend the use of isopropyl alcohol or acohol wipes.
- Loctite®
- All screws must have a medium-strength, medium-to-high temperature threadlocker applied in accordance with their manufacturer's instructions. We reocmmend a small appliaction of Green Loctite 290 on each screw. Blue Loctite 246, 242, or 248, are also acceptable if you intent to remove the compensator more regularly, but these products are more likely to loosen under an aggressive firing schedule.
1. Verify the Correct Light:
- Ensure you have the required light for the assembly, specifically the Streamlight listed above and variant designed for a 1913 rail system.
- Other Weapon Lights models will not work.
2. Disassemble the Streamlight:
- Begin by removing the thumb screw from the sliding rail of the light. Thumb screw that comes with light is not needed.
3. Set aside the Correct Insert:
- Set aside the #4 insert included with the light set - this is required for the assembly.
4. Seperate the Rails:
- Utilizing a 5/64” Allen wrench, unscrew the screws holding the separate rail from the stationary rail.
- Keep the screws and additional rails for potential future use.
5. Prepare the Firearm:
- Ensure the firearm is unloaded before proceeding.
- Ensure your rail is clean.
- Slide the compensator onto the firearm, ensuring a snug fit and leaving a slight gap.
- Bring the slide home gently to align the compensator properly.
6. Insert the #4 Insert:
- Turn the #4 insert upside down and place it into the rail, ensuring the boss portion is correctly positioned.
- Adjust the compensator to the appropriate location to allow the insert to fit, ensuring it resembles the desired configuration.
7. Attach the Light:
- Align the light with the compensator and carefully secure it in place.
- Adjust as needed to ensure proper alignment and fit between the light and compensator.
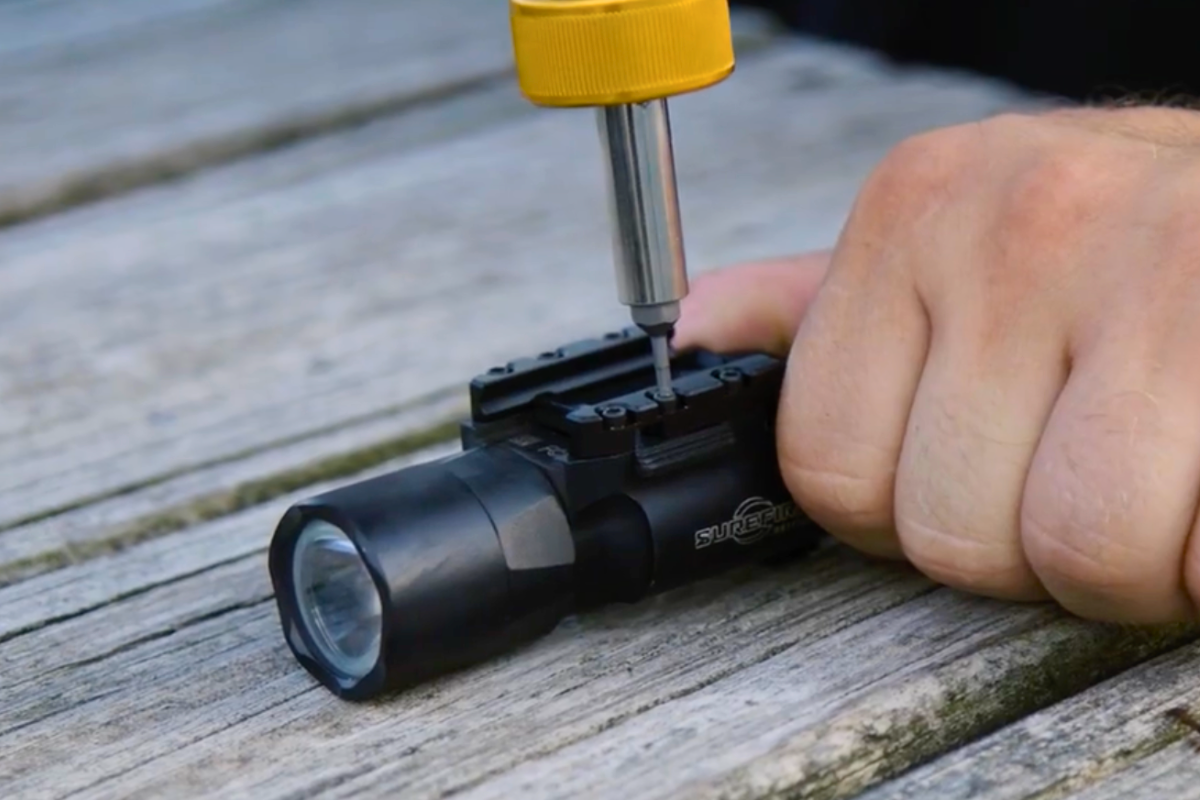
8. Attach the Center Screw:
- Apply Loctite to the center screw and ensure the washer is correctly positioned within the designated pocket.
- Insert the Washer and Center Screw and then tighten the Center Screw 10 inch-pounds using a torque wrench. Remove any excess residue.
- DO NOT OVERTIGHTEN
9. Secure with Screws and Loctite:
- Apply Loctite to the screws and carefully align them with the corresponding holes.
- We recommend using a torque wrench.
- Apply 5-6 inch-pounds from a torque wrench to firmly secure the screws in place.
- If you are not using a torque wrench, gradually tighten the screws until they are fully seated at the bottom, avoiding cross-threading.
- Then tighten an additional 1/8 of a turn to ensure they are fully seated and secure.
- DO NOT OVERTIGHTEN
- Note: The use of Loctite is essential to ensure the screws do not back out over time with firing.
10. Allow for Drying Time:
- Allow the assembly to dry for at least a day to ensure the Loctite sets properly.
- Witness mark all three screws with an oil-based paint pen for future reference to detect any loosening.
- The first time the firearm is fired with the compensator installed, the screws should be checked after the first few shots to insure it has been installed properly.
- Regularly check your witness marks to ensure that the screws have not loosened. If they loosen during firing, re-torque them immediately.
- If any of the attachment screws become damaged or loose, do not attempt to fire the handgun with the compensator attached. You will need to replace the screw.
11. Final Inspection:
- Perform a final inspection to ensure the proper assembly of the compensator and verify its secure attachment to the firearm.
PLEASE NOTE:
- Will not reduce slide velocity or induce reliability issues.
- DO NOT USE WITHOUT THE PISTOL LIGHT ATTACHED TO THE COMPENSATOR. The pistol light is required to attach the compensator to the gun. Ensure the compensator is properly seated and installed prior to live fire. Failure to do so can result in damage to the compensator that is not repairable under the warranty.
Upgrading your handgun with a compensator requires a higher level of maintenance and care. Ensuring that it is installed correctly and checked frequently is critical for proper function and safety.
Results may vary depending on the handler. Vantage Point Armory is not in any way responsible for the misuse of firearms or firearm parts/accessories or the results of such misuse. We highly recommend gun owners inspect parts and accessories frequently. This will help mitigate the possibility of accidents and malfunctions.
*The Vantage Point Compensator is intended for use on OEM pistols only - VPA does not guarantee function or reliability with aftermarket or modified guns
How to Clean Residue from Your Firearm & Compensator
Residue buildup is completely normal—it’s just carbon and fouling left behind from firing. Over time, it can collect on your firearm and compensator, especially around muzzle devices. The good news? It’s easy to clean off, and it doesn’t damage or remove your Cerakote finish when handled properly.
Important note: We’ve seen cases where people try to scrub off the residue too aggressively, which actually ends up polishing the carbon rather than removing it. This can give the illusion that the Cerakote is coming off—but it’s really just shiny residue left behind.
Regular maintenance keeps your setup performing smoothly and helps prolong the life of your gear. In this guide, we’ll walk you through how to properly clean that buildup and get your firearm looking and functioning like it should.
Click here to view our recommendation on how to clean residue from your firearm and compensator.
Orders are typically shipped within
one to two business days via USPS Priority Mail — this means your order should
be delivered within three to five business days!
We also offer expedited shipping options,
as well as international shipping.
Free Standard Shipping on U.S. orders $150 or more.